Set up a virtual Windows Server 2016 for Homelab: Part 8: Sharing a Virtual Printer
In this installment we will be setting up a shared printer which workstations on the client will be able to access. We will first add the printer in the Printer Installation Wizard and then configure a Group Policy which we can apply to our target Organizational Unit.


Now that we've shared the printer, let's configure the Group Policy to share the printer with the target OU.


And your shared printer is now ready to be installed on the workstaions on your network!


And now you have access to this printer on your current workstation. Repeat the process as necessary for every computer.
In the next part of the series we will install and learn how to update windows with the Windows Server Update Services.
Be sure to have your Print Server Role installed.
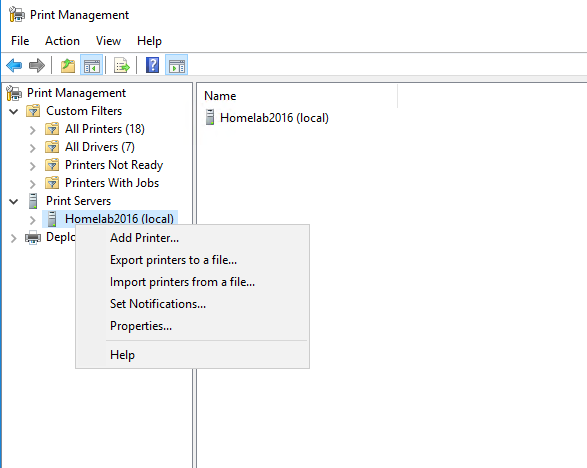
Share the Printer from the Server Manager
Server Manager > Tools > Print Management > Print Servers > Right-click Server > Add Printer...
Add a new printer using an existing port > select Print to File > Next
The following steps are for the person looking to simply install a dummy printer to practice sharing with.
Install a new driver > Next
Choose a random printer > Next
Give the Printer a Name and a Share name > Next > Finish
Now that we've shared the printer, let's configure the Group Policy to share the printer with the target OU.
Configure the Group Policy to Share the Printer with Clients
Server Manager > Tools > Group Policy Management > Group Policy Objects > New > Give the GPO
a name (Shared Share Homelab)> OK
Right-click the GPO you just created > Edit > Go to Computer Configuration \ Policies \ Windows
Settings \ Deployed Printers > Right-click Deployed Printers > select Deploy Printer > Enter the
printer information using the following format \\ServerName\Printer Share Name > Add > OK
Now, let's link the GPO to the target Organizational Unit. In my case the whole server.
Link the GPO to the Target Organizational Unit
Right-click OU > Link to an Existing GPO... >Choose the Group Policy to apply > OK
And your shared printer is now ready to be installed on the workstaions on your network!
Install the Shared Printer on a Workstation
Control Panel > Devices and Printers >
Add a printer > The printer that I want isn't listed >
Select a shared printer by name > input the shared printer's location using the following format \\servername\Printer Name > Next > Next > Finish
You should now see your newly installed printer in the Devices and Printers Window
And now you have access to this printer on your current workstation. Repeat the process as necessary for every computer.
Comments
Post a Comment